Roof Inspection Checklist for Homeowners: The Ultimate Guide to DIY and Professional Inspections
A comprehensive roof inspection saves homeowners thousands by detecting issues before they escalate into leaks, rot, or structural failures. This guide delivers a fully detailed roof inspection checklist download, covering what an inspection includes, step-by-step DIY methods, damage warning signs, the value of hiring experts, maintenance best practices, key roofing components, and instructions for obtaining a free printable checklist. Along the way, homeowners will discover how to integrate professional support—from scheduling an expert evaluation to exploring high-quality materials—ensuring a secure, long-lasting roof.
What Is a Roof Inspection and Why Is It Important for Homeowners?
A roof inspection is a thorough examination of a home’s roof to assess its condition, identify potential issues, and ensure it is functioning as intended. Typically conducted by a professional roofing contractor or inspector, this process involves checking for signs of wear and tear, damage, leaks, and other factors that could compromise the roof’s integrity. During an inspection, elements such as shingles, flashing, gutters, and ventilation systems are meticulously evaluated to provide a comprehensive understanding of the roof’s health. Homeowners often choose to have roof inspections performed regularly, especially after severe weather events or as part of routine maintenance, to stay proactive about their property’s upkeep.
The importance of roof inspections for homeowners cannot be overstated. Regular inspections can uncover minor problems before they escalate into significant issues, saving homeowners considerable time and money in the long run. Additionally, a well-maintained roof helps prevent costly structural damage to a home and protects against leaks that can lead to mold and pest infestations. Moreover, having a clear picture of a roof’s condition is essential for planning future repairs or replacements and can significantly influence a homeowner’s insurance policy. Ultimately, by investing in roof inspections, homeowners safeguard their property, enhance its value, and ensure the safety and comfort of their living environment.
A roof inspection is a systematic evaluation of all roofing elements to identify wear, damage, or potential failures, ensuring structural integrity and preventing water infiltration. By examining shingles, flashing, gutters, vents, and interior attic spaces, homeowners gain early insight into emerging issues and protect property value.
Roof Inspection Importance for Homeowners
Preventive assessment directly reduces repair expenses and extends roof lifespan. Understanding inspection components lays the foundation for both DIY checks and professional services, guiding homeowners toward the next logical step: defining what falls under a complete inspection.
What Does a Roof Inspection Include?
A thorough roof inspection encompasses exterior and interior evaluations across key elements:
- Shingle condition and granule loss
- Flashing seals around chimneys, vents, and skylights
- Gutter alignment, debris clearance, and fastener integrity
- Soffit and fascia for rot or pest damage
- Attic and roof deck for moisture stains or mold
These checks ensure every critical component is reviewed, preparing the homeowner to understand preventive benefits in the next section.
How Does Regular Roof Inspection Prevent Costly Repairs?
Routine inspections detect minor cracks, loose shingles, or flashing gaps that, if overlooked, can lead to leaks, wood rot, and interior damage. Early identification of compromised caulking or clogged gutters prevents water pooling and structural decay, saving up to 30% on repair costs over a roof’s lifecycle. Recognizing this cost-saving mechanism transitions seamlessly into guidance on inspection timing.
When Should Homeowners Inspect Their Roof?
Homeowners should conduct roof inspections at least once a year and immediately after severe weather events such as hailstorms, heavy winds, or ice accumulation. Scheduling checks in spring and fall aligns with seasonal extremes and helps spot issues before temperature fluctuations exacerbate damage. Proper timing establishes a maintenance rhythm that supports both DIY efforts and professional services.
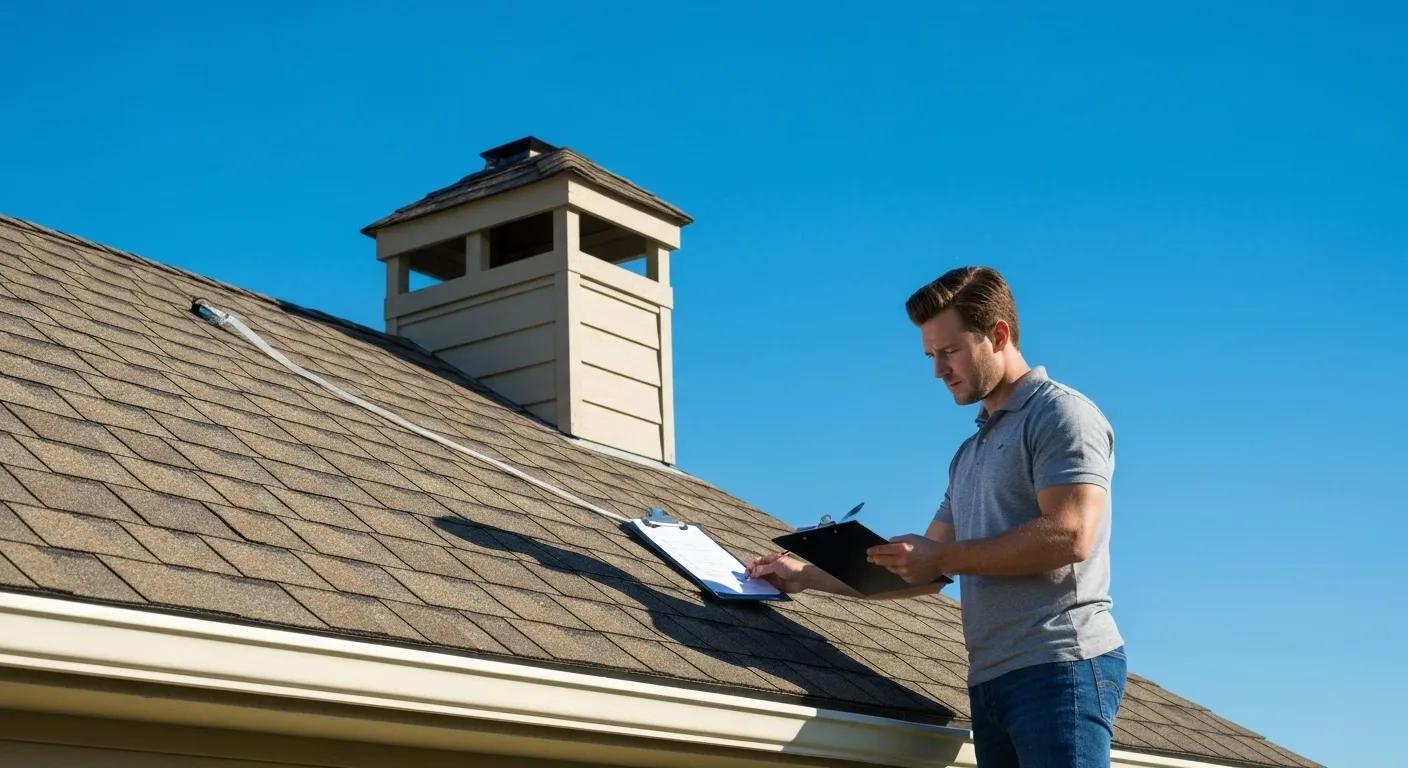
How to Perform a DIY Roof Inspection: Step-by-Step Checklist for Homeowners
Performing a DIY roof inspection can be a rewarding and essential task for homeowners looking to maintain the integrity of their homes. A well-maintained roof protects against water damage, pest invasions, and potential structural issues. To conduct a thorough inspection, homeowners should begin by gathering necessary tools, such as a sturdy ladder, a flashlight, and a notepad for recording any findings. The inspection process can be divided into several key steps. First, it’s important to assess the exterior of the roof from the ground level. Homeowners should look for visible signs of damage, such as missing shingles, sagging areas, or discoloration, which may indicate potential leaks or structural issues.
Once the ground-level assessment is complete, homeowners can safely climb the ladder to inspect the roof more closely. This includes checking for cracked, curled, or missing shingles, as well as examining the flashing around chimneys and vents for any signs of deterioration. While up on the roof, it’s crucial to look for any debris, such as leaves or branches, that could trap moisture and lead to mold or rot. Additionally, inspecting the gutters for proper drainage and any blockages will contribute to the roof’s overall health. After completing the inspection, homeowners should document their findings and prioritize any necessary repairs to ensure their roof remains in excellent condition for years to come. By taking these proactive steps, homeowners not only safeguard their investment but also gain peace of mind knowing their home is well-protected.
Performing a DIY roof inspection empowers homeowners to spot visible issues safely and efficiently, reducing dependence on emergency repairs. This step-by-step checklist pairs practical procedures with clear safety guidance.
What Tools and Safety Precautions Are Needed for DIY Roof Inspection?
Conducting a DIY roof inspection can be a crucial part of home maintenance, allowing homeowners to identify potential issues before they escalate into costly repairs. To effectively and safely perform this task, specific tools and safety precautions are essential. Common tools required for a thorough roof inspection include a sturdy ladder, preferably reaching at least three feet above the eaves, to facilitate safe access to the roof’s surface. A pair of work gloves can protect the hands from sharp edges and debris, while a flashlight is invaluable for inspecting dark areas, particularly in attics or between roofing materials. A notepad or a digital device can help record findings, making it easier to keep track of necessary repairs or areas of concern.
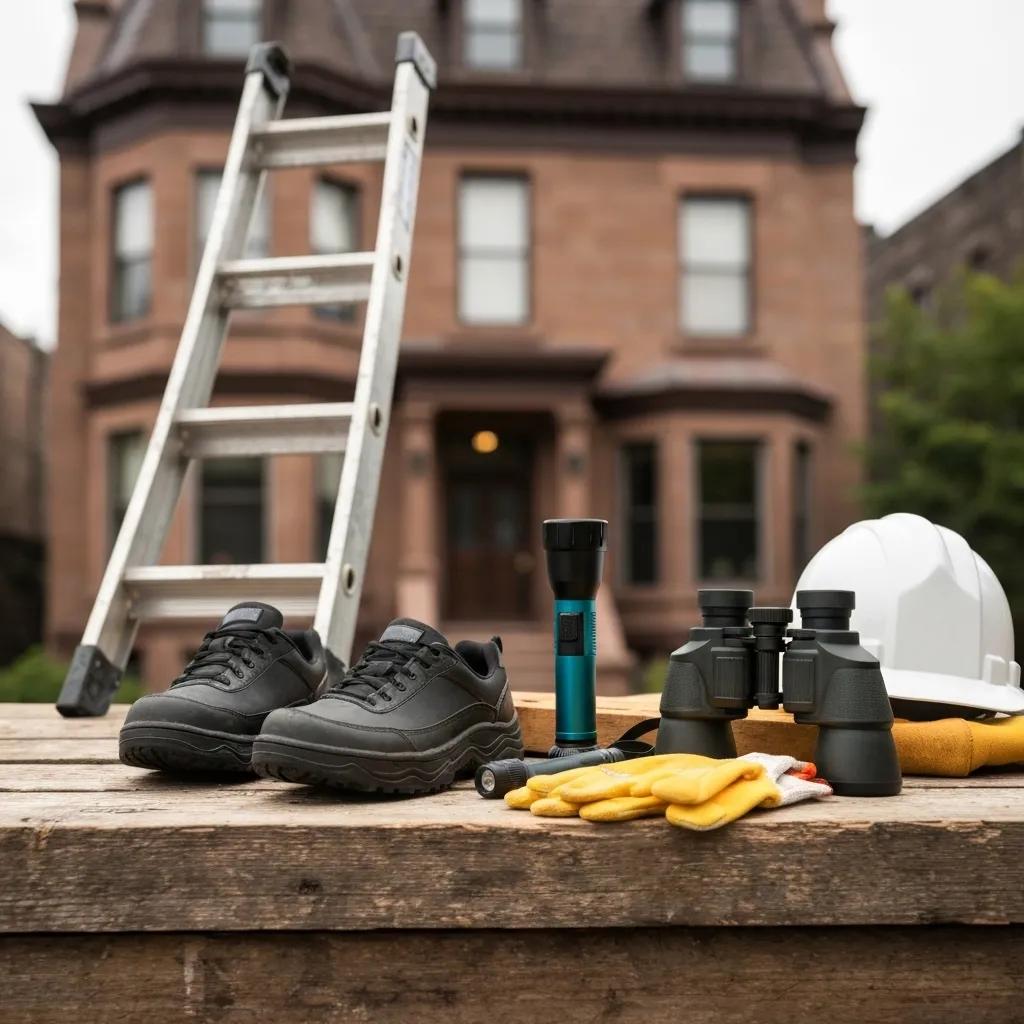
Before stepping onto a ladder, assemble essential tools and prioritize fall prevention:
- Sturdy ladder with stabilizing feet
- Non-slip footwear and safety harness
- Flashlight and moisture-sensitive detector
- Binoculars for remote shingle observation
- Work gloves and hard hat
DIY Roof Inspection Safety
Ensuring proper equipment and personal protective measures prevents accidents and readies homeowners for exterior component reviews.
How to Inspect Exterior Roof Components: Shingles, Flashing, Gutters, and More
A methodical exterior assessment covers surface materials and drainage systems:
- Examine shingles for cracks, curling edges, or missing granules.
- Verify flashing adhesion around chimneys and vents to prevent water intrusion.
- Check gutters and downspouts for blockages, rust spots, and secure brackets.
- Inspect soffit and fascia for rot or insect nests.
- Look for settlement or sagging in decking that signals structural issues.
This exterior checklist sets the stage for interior attic evaluations, ensuring a comprehensive review.
How to Check Interior Areas: Attic, Roof Deck, and Signs of Water Leaks
Inspecting the attic and roof deck from below reveals hidden moisture and insulation problems:
- Look for dark water stains on roof decking and rafters.
- Feel for damp insulation or musty odors signaling mold growth.
- Inspect vent baffles for proper airflow and unobstructed insulation.
- Check ceiling drywall for bulges or discoloration.
- Monitor attic temperature and humidity levels for ventilation adequacy.
Detecting these interior signs completes a full DIY inspection and leads naturally into recognizing damage symptoms.
What Are the Common Signs of Roof Damage Every Homeowner Should Know?
Homeowners often overlook the condition of their roofs until significant damage has occurred, leading to costly repairs and safety hazards. Recognizing the common signs of roof damage is essential for maintaining a secure and efficient home. One of the most visible indicators of roof distress includes missing or damaged shingles. These shingles may curl, buckle, or crack due to age, weather conditions, or improper installation. A thorough inspection of the roof’s surface can reveal these issues, which often result in leaks and compromised structural integrity if left unaddressed.
Another critical sign of roof damage is the presence of water stains or mold on ceilings and walls within the home. This typically indicates that water is seeping through the roof, which can stem from damaged flashing around chimneys or vents, or accumulated debris in gutters that prevents proper drainage. Homeowners should also be aware of granule loss from shingles, which can accumulate in gutters or downspouts. This granular material protects shingles from UV rays, and its loss can lead to accelerated wear and tear. By staying vigilant about these common signs of roof damage, homeowners can take proactive measures to ensure the longevity of their roofs and safeguard their homes against further deterioration. Early recognition of damage patterns allows timely repairs and preserves roof integrity. Homeowners should remain vigilant for specific indicators across materials and structures.
How to Identify Shingle Damage and Missing Granules
Identifying shingle damage and missing granules is crucial for maintaining the integrity of a roof. Homeowners and property managers should be vigilant in inspecting the condition of their shingles, especially after severe weather events. One primary indicator of shingle deterioration is the presence of bare spots or missing granules. Granules act as a protective layer that shields shingles from UV rays and harsh weather conditions; without them, the underlying asphalt is exposed and can degrade quickly. A simple visual inspection can often reveal these issues: shingles may appear shiny or discolored where granules are missing, while loose granules can accumulate in gutters or at the base of downspouts. Shingles protect underlying decking and membrane; granule loss weakens UV resistance and accelerates wear. Look for:
- Exposed fiberglass mat beneath granule layer
- Discoloration or bare spots on roof surface
- Accumulated granules in gutters or at downspout exits
Noticing these signs highlights the need for targeted repairs and introduces flashing concerns next.
What Are the Warning Signs of Flashing and Roof Deck Problems?
When it comes to maintaining the integrity of a building’s roof, recognizing the warning signs of flashing and roof deck problems is crucial for preventing more extensive damage. Flashing, the material used to direct water away from critical areas of the roof, can often be a focal point for issues. Homeowners should be vigilant for signs such as curling, cracking, or missing pieces of flashing, which can lead to water infiltration and compromise the roof’s overall effectiveness. Additionally, discoloration or stains on interior ceilings and walls may indicate leaks originating from failed flashing, suggesting that it’s time to conduct a thorough inspection. Flashing seals are critical to water management; compromised seals lead to rot and leaks. Check for:
- Gaps or rust at flashings around penetrations
- Cracked or missing caulking beads
- Warped or sagging roof decking visible near eaves
Recognizing flashing failures underscores the importance of interior leak detection, which follows.
How to Detect Water Leaks and Attic Moisture Issues Early
Detecting water leaks and attic moisture issues early is crucial for maintaining the integrity of a home. Homeowners should be proactive in monitoring for signs of water damage, as early detection can prevent costly repairs and protect against potential health hazards such as mold growth. One effective way to identify leaks is through visual inspections. Homeowners should regularly check ceilings, walls, and floors for discoloration, water stains, or peeling paint, which are often indicative of underlying moisture problems. Additionally, inspecting the attic for any signs of dampness, such as wet insulation or rust on metal components, can help pinpoint issues before they escalate. Moisture intrusion from roof breaches often appears first in attic spaces. Early detection includes:
- Wet insulation clumping or darkened wood framing
- White powdery mold or rust stains on metal supports
- Dripping sounds or visible drips during rain
These moisture signals prepare homeowners to weigh DIY limitations and next consider professional expertise.
When and Why Should You Hire a Professional Roof Inspection Service?
When it comes to maintaining a home, the roof often takes a backseat to more visible aspects like landscaping or interior design. However, the roof is a critical component, protecting the home from the elements and ensuring longevity. Homeowners should consider hiring a professional roof inspection service at least once a year, ideally before major weather changes or after a significant storm. In these situations, trained professionals can identify wear and tear, leaks, and other potential issues that might not be immediately visible. Regular inspections help homeowners stay ahead of costly repairs, ensuring the integrity of the home while providing peace of mind.
Furthermore, hiring a professional roof inspection service can be invaluable when purchasing a new home. Homebuyers should never underestimate the importance of a thorough roof inspection, as hidden damage can lead to unexpected expenses down the road. A certified inspector offers an unbiased assessment, helping potential buyers make informed decisions and negotiate repairs or price adjustments. Ultimately, whether for routine maintenance or during a real estate transaction, the expertise offered by professional roof inspectors is a worthwhile investment that protects the homeowner’s property and financial interests. Engaging a certified roofing contractor ensures a comprehensive, liability-free evaluation backed by industry expertise. Professional inspectors deploy advanced diagnostic tools and deliver actionable reports for repairs or insurance claims.
What Are the Benefits of a Professional Roof Inspection?
A professional roof inspection serves as a critical element in maintaining the integrity and longevity of a home. Engaging a qualified inspector enables homeowners to uncover potential issues that might go unnoticed during casual observations. These inspections delve deeper than the surface, identifying areas of wear and tear, leaks, or structural weaknesses that could lead to costly repairs down the line. By addressing problems early, homeowners can save themselves from the stress and expense of emergency repairs, ensuring their roof continues to protect their investment effectively.

Hiring an expert provides homeowners with:
- Detailed assessment using infrared scanning and drone imaging
- Safety-assured inspections without personal risk
- Comprehensive written reports for insurance or resale
- Expert recommendations for repair, maintenance, or replacement
Professional Roof Inspection Benefits
These advantages create clear value, guiding homeowners to understand service scope in the following list.
What Does a Professional Roof Inspection Include?
A professional roof inspection is a comprehensive evaluation designed to assess the overall condition of a roof and identify any existing or potential issues. During a standard inspection, a qualified roofing expert begins by visually examining the entire roof structure, paying close attention to various components such as shingles, flashing, gutters, and ventilation systems. The inspector looks for signs of damage, wear, or age, taking note of any visible cracks, blisters, or missing materials. Furthermore, the inspection often includes an assessment of the roof’s drainage system to ensure that water is flowing appropriately and does not pose a risk of leakage or structural damage. A licensed roof inspector examines all major components with specialized equipment:
- Infrared thermography to locate hidden moisture.
- High-resolution drone flyovers for inaccessible areas.
- Moisture meter testing on decking and sheathing.
- Structural evaluation of trusses and support systems.
- Comprehensive digital report with photographic evidence.
This service breadth clarifies cost expectations and naturally leads to a cost comparison.
How Much Does a Professional Roof Inspection Cost?
When considering the cost of a professional roof inspection, homeowners often find that prices can vary significantly based on various factors. On average, a standard roof inspection can range from $100 to $500. The price typically depends on the size and complexity of the roof, as well as the inspector’s experience and reputation. For instance, larger homes or those with multi-layered or complex roofing systems may attract higher fees due to the additional time and expertise required for a thorough assessment. Additionally, geographical location plays a role, with urban areas potentially seeing higher costs compared to rural settings. Below is a typical cost breakdown for professional roof inspections in residential settings:
These figures guide budgeting and reinforce the value of getting an instant roofing quote for precision—homeowners can get an instant roofing quote to compare pricing and schedule services.
How to Maintain Your Roof for Longevity: Essential Tips for Homeowners
Maintaining a roof is a critical aspect of homeownership that often goes overlooked until serious issues arise. A well-maintained roof not only enhances a home’s curb appeal but also significantly increases its longevity, ultimately saving homeowners from costly repairs or premature replacement. Essential tips for maintaining a roof include regular inspections, cleaning, and timely repairs. Homeowners should aim to conduct visual inspections at least twice a year, ideally in the spring and fall, to identify potential problems such as missing shingles, rusted flashing, or accumulated debris. By addressing these issues promptly, homeowners can prevent more extensive damage that often accompanies neglect.
Additionally, regular cleaning is vital for preserving the integrity of a roof. This includes the removal of leaves, branches, and other debris that can trap moisture and lead to mold growth or rot. Homeowners should also pay special attention to gutters, ensuring they are free of clogs to facilitate proper drainage. In areas prone to moss or algae growth, implementing preventative treatments can reduce wear and tear on roofing materials. Finally, enlisting a professional for periodic inspections and maintenance can provide invaluable expertise. By following these essential tips, homeowners can ensure their roofs remain durable and functional for many years to come.Consistent maintenance protects investment by preventing small issues from escalating. Regular care ensures peak performance of roofing materials and underlying structures.
Why Is Gutter Cleaning Important for Roof Health?
Gutter cleaning is a critical maintenance task that often goes overlooked, yet its importance cannot be overstated, particularly when it comes to the health of a roof. Clogged gutters can lead to a cascade of issues that compromise both the roof and the overall structure of a home. When gutters are filled with debris, such as leaves, twigs, and dirt, they become incapable of channeling water away from the roof and foundation effectively. This blockage can lead to water pooling on the roof, which increases the risk of leaks, mold growth, and even damage to shingles. Over time, untreated roof leaks can jeopardize insulation and structural integrity, resulting in costly repairs. Clean gutters channel rainwater away from the roof edge and foundation, preventing:
- Water back-flow that lifts shingles
- Ice dam formation in winter
- Foundation erosion near eaves
Routine debris removal safeguards shingles and flashing, leading into moss prevention strategies next.
How to Remove Moss and Prevent Roof Damage
Moss can be a charming sight in nature, but when it grows on roofs, it can lead to serious structural damage if left unchecked. This plant thrives in damp and shaded environments, often taking root in the nooks and crannies of shingles. As it grows, moss can trap moisture, which over time can lead to the deterioration of roofing materials, resulting in leaks and costly repairs. To effectively remove moss, homeowners should begin by employing a stiff-bristled brush to gently scrub the affected areas. It’s essential to work carefully to avoid damaging the shingles. After the initial scrubbing, applying a specialized moss removal solution or a homemade mix of water and vinegar can help eradicate any remaining spores. Rinsing the roof thoroughly afterward will ensure that no harmful residues are left behind. Moss retains moisture against roofing substrates, accelerating rot and granule loss. To manage moss:
- Apply low-pressure soft wash treatments with sodium bicarbonate solutions.
- Gently brush affected areas with a non-metallic curved scraper.
- Install zinc or copper strips along the ridge to inhibit regrowth.
Effective moss control preserves shingle integrity and primes the roof for proper attic ventilation.
What Role Does Attic Ventilation Play in Roof Longevity?
Attic ventilation plays a crucial role in enhancing the longevity of a roof by regulating temperatures and moisture levels within the attic space. An adequately ventilated attic allows for the consistent circulation of air, which helps to maintain a balance between the ambient temperature outside and the heat rising from the living areas below. During the warmer months, this ventilation helps to dissipate heat, preventing the shingles from overheating and degrading more quickly. Conversely, in colder months, proper ventilation minimizes the occurrence of ice dam formation on the roof, which can lead to substantial water damage and structural issues if left unchecked. By managing these temperature extremes, a well-ventilated attic effectively contributes to the overall durability of roofing materials. Balanced attic airflow regulates temperature and moisture, reducing:
- Heat buildup that degrades shingles
- Condensation that promotes mold and wood decay
- Ice dam risks by equalizing roof surface temperature
Ensuring soffit and ridge vents remain clear completes the maintenance cycle and sets up an understanding of core roofing components.
What Are the Key Components of Your Roofing System Every Homeowner Should Understand?
Understanding the key components of a roofing system is essential for every homeowner, as it lays the foundation for maintaining the integrity and longevity of their home. At the heart of a roofing system is the roof deck, typically made from plywood or oriented strand board (OSB), which provides structural support. The decking serves as the base for additional layers, ensuring that the roof can withstand various weather conditions. Above the deck, homeowners should be familiar with the underlayment, which acts as a barrier against moisture and serves as an extra layer of protection against the elements, particularly in areas prone to heavy rain or snow.
Another crucial component is the roofing material itself, be it asphalt shingles, metal, tile, or flat roofing membranes, each presenting unique benefits and considerations. Homeowners should also be aware of the importance of flashing—pieces of metal or other materials installed around chimneys, vents, and the roof’s edges to prevent water infiltration. Lastly, adequate ventilation is vital to preserving the roof’s lifespan and ensuring energy efficiency. Proper ventilation helps regulate temperature and moisture levels in the attic, preventing issues such as mold growth and ice dam formation. By understanding these key components, homeowners can make informed decisions about maintenance, repairs, and upgrades, ultimately protecting their investment for years to come. A roofing system combines materials and structures that work in tandem to protect against weather. Recognizing each part’s function helps in targeted inspections and effective repairs.
What Are the Different Roofing Materials and Their Inspection Needs?
Roofing materials vary in durability, weight, and inspection criteria:
Exploring material-specific requirements highlights the importance of quality products—homeowners may wish to explore Atlas roofing products to select durable shingle options that simplify future inspections.
How Does Flashing Protect Your Roof and What to Look For?
Flashing is a crucial component in roofing systems, serving as a protective barrier that prevents water infiltration around vulnerable areas such as chimneys, vents, and skylights. Made from materials like metal or rubber, flashing directs rainwater away from these spots and reduces the risk of leaks and water damage. When properly installed, it acts as a sealant that prevents moisture from seeping into the underlying structure, ensuring the roof maintains its integrity over time. This is particularly important in climates with heavy rainfall or snow, where water buildup and ice damming can lead to significant structural issues if not addressed. Flashing acts as a waterproof barrier at roof intersections and penetrations. Key inspection points include:
- Corrosion or rust on metal flashings
- Gaps or separation at joints and sealant cracks
- Presence of sealant residue or adhesive breakdown
These checks confirm that integrated barriers remain watertight, leading to the role of the roof deck.
Why Is the Roof Deck Important and How to Inspect It?
The roof deck is a critical component of any roofing system, serving as the foundational layer that supports the entire structure. It provides not only structural integrity but also acts as a vital barrier against the elements. Typically made from materials such as plywood, oriented strand board (OSB), or metal, the roof deck is designed to handle the weight of roofing materials while also supporting the loads imposed by snow, wind, and other environmental factors. A well-maintained roof deck can enhance the overall lifespan of a roof, prevent costly leaks, and reduce the risk of structural damage, making it an essential consideration for homeowners and building managers alike. The roof deck is the structural foundation for all roofing materials; its integrity is vital for load distribution and waterproofing underlayment. Inspection steps involve:
- Looking for soft or spongy areas indicating rot
- Verifying sheathing attachment and nail pull-through
- Checking for water stains on underside of decking in the attic
Assessing deck health completes the system overview and transitions into acquiring a printable checklist.
Where Can Homeowners Download a Free Roof Inspection Checklist PDF?
Homeowners seeking to maintain the integrity of their roofs often find themselves in need of practical resources that can guide their inspection process. One of the most effective tools for this purpose is a free roof inspection checklist PDF. Numerous websites dedicated to home maintenance and improvement offer downloadable checklists tailored specifically for evaluating roofs. These resources typically include sections outlining what to look for during an inspection, such as assessing shingles, checking gutters, and identifying signs of water damage or wear. Homeowners can easily find these PDFs through reputable industry websites, local roofing contractors, or even non-profit organizations focused on housing safety.
In addition to general home improvement sites, homeowners might also explore specialized roofing companies that provide valuable educational resources. Many of these businesses understand the importance of empowering consumers and may offer checklists as part of their commitment to homeowner education. These downloadable guides not only help homeowners conduct thorough inspections but also provide peace of mind by ensuring that they are aware of potential issues before they escalate into costly repairs. By taking advantage of these free resources, homeowners can foster better care for their roofs and enhance the longevity of their homes. Homeowners can access a professionally crafted, printable roof inspection checklist that consolidates all key steps and components into one convenient form. This resource ensures no inspection element is overlooked, promoting consistent preventive care.
What Should a Printable Roof Inspection Checklist Include?
When conducting a roof inspection, a comprehensive printable checklist is essential to ensure no critical elements are overlooked. A well-structured checklist should begin with a thorough evaluation of the roof’s overall condition, including checking for any signs of sagging, buckling, or missing shingles. Inspectors should also look for rust, corrosion, or damage to metal elements, such as flashing and vents. Documenting any visible signs of wear and tear not only helps in identifying immediate issues but also provides a historical record of the roof’s condition over time, which can be invaluable for future repairs or evaluations. An effective checklist PDF compiles essential inspection points:
- Exterior elements: shingles, flashing, gutters, vents
- Interior inspections: attic leaks, insulation condition, ventilation
- Tools and safety reminders for each step
- Date and signature fields for record-keeping
Having this document on hand streamlines inspections and supports systematic maintenance.
How to Use the Roof Inspection Checklist Effectively?
Using a roof inspection checklist effectively is essential for both homeowners and professionals tasked with maintaining roof integrity. A well-structured checklist serves as a comprehensive guide, ensuring that no critical areas are overlooked during the inspection process. To maximize its utility, one should begin by familiarizing themselves with the specific components that need assessment, such as roofing materials, flashing, drainage systems, and potential signs of wear or damage. By understanding what to look for, the inspector can methodically address each section of the checklist, ensuring a thorough evaluation. To maximize checklist utility, homeowners should:
- Review safety gear and secure ladders before starting.
- Mark each item as it’s inspected, noting observations or photos.
- Retain dated copies for annual comparison and warranty claims.
Applying these practices builds an inspection history that aids in trend analysis and repair planning.
How to Schedule a Professional Inspection After Using the Checklist?
Scheduling a professional inspection after completing a thorough checklist is a crucial step in ensuring the safety and integrity of any property. Once individuals have systematically assessed their spaces using the checklist, the next logical progression is to engage a qualified inspector who specializes in the specific type of inspection needed—be it home, commercial, or environmental. The first step toward scheduling involves identifying reputable inspection professionals, which can be done through word-of-mouth referrals, online reviews, and local directories. It’s essential to verify credentials, experience, and whether they hold the necessary licenses to conduct inspections in the relevant jurisdiction. By selecting a qualified professional, individuals can ensure that any issues noted in the checklist will be addressed comprehensively and that nothing is overlooked. Once DIY evaluation identifies concerns beyond basic maintenance, homeowners can seamlessly transition to expert services by:
- Comparing checklist notes against professional service offerings
- Requesting site-specific quotes based on documented findings
- Booking an appointment through an easy online form
For precise estimates and rapid scheduling, homeowners can get an instant roofing quote and arrange a full professional inspection. Concluding a methodical approach to roof health, this guide equips homeowners with the knowledge to conduct thorough DIY inspections, recognize damage early, maintain longevity, and engage professional expertise—empowering confident, proactive roof management.
Frequently Asked Questions
What are the signs that indicate I need a roof replacement rather than just repairs?
Homeowners should consider a roof replacement if they notice extensive shingle damage, such as widespread granule loss, curling, or missing shingles. Additionally, if there are multiple leaks or significant water damage in the attic, it may indicate that the roof’s structural integrity is compromised. Other signs include sagging areas, visible rot in the decking, or if the roof is nearing the end of its expected lifespan, typically 20-30 years for asphalt shingles. Consulting a professional can provide clarity on the best course of action.
How can I prepare my roof for winter weather?
To prepare your roof for winter, start by cleaning gutters to prevent ice dams, which can cause water to back up under shingles. Inspect and repair any damaged flashing and shingles to ensure they are watertight. Additionally, consider trimming overhanging branches to prevent them from falling on the roof during storms. Insulating the attic can help maintain a consistent temperature, reducing the risk of ice dams. Finally, schedule a professional inspection to address any potential issues before winter weather sets in.
What should I do if I find mold in my attic during an inspection?
If you discover mold in your attic, it’s essential to address it promptly to prevent health issues and further damage. First, identify and eliminate the source of moisture, which could be due to leaks or poor ventilation. Next, wear protective gear and remove the mold using a mixture of water and detergent or a specialized mold remover. If the infestation is extensive, consider hiring a professional mold remediation service. After cleaning, improve attic ventilation to prevent future mold growth.
How often should I clean my gutters to maintain roof health?
Homeowners should clean their gutters at least twice a year, ideally in the spring and fall. However, if you have overhanging trees, more frequent cleanings may be necessary to prevent debris buildup. Clogged gutters can lead to water overflow, which can damage the roof, siding, and foundation. Regular maintenance ensures that rainwater is effectively channeled away from the roof and home, reducing the risk of leaks and structural damage.
What are the risks of ignoring roof maintenance?
Ignoring roof maintenance can lead to significant risks, including costly repairs and reduced lifespan of the roofing system. Small issues, such as minor leaks or damaged shingles, can escalate into major problems like structural damage, mold growth, and compromised insulation. Additionally, neglecting maintenance can void warranties and decrease property value. Regular inspections and upkeep are essential to ensure the roof remains in good condition and to protect your investment in your home.
Can I perform a roof inspection during bad weather?
It is not advisable to perform a roof inspection during bad weather, such as heavy rain, snow, or strong winds, as these conditions can be dangerous and may obscure visible damage. Instead, wait for clear weather to ensure your safety and to accurately assess the roof’s condition. If you suspect significant damage after a storm, consider hiring a professional who can safely evaluate the roof using appropriate equipment and techniques.
What should I do if I notice a leak after a heavy rain?
If you notice a leak after heavy rain, it’s crucial to act quickly to minimize damage. First, contain the leak by placing a bucket or container under the drip to catch water. Then, inspect the area for visible signs of damage, such as wet spots or stains on the ceiling. If you can safely access the roof, check for missing shingles or damaged flashing. Contact a professional roofing contractor as soon as possible to assess the situation and perform necessary repairs to prevent further damage.